
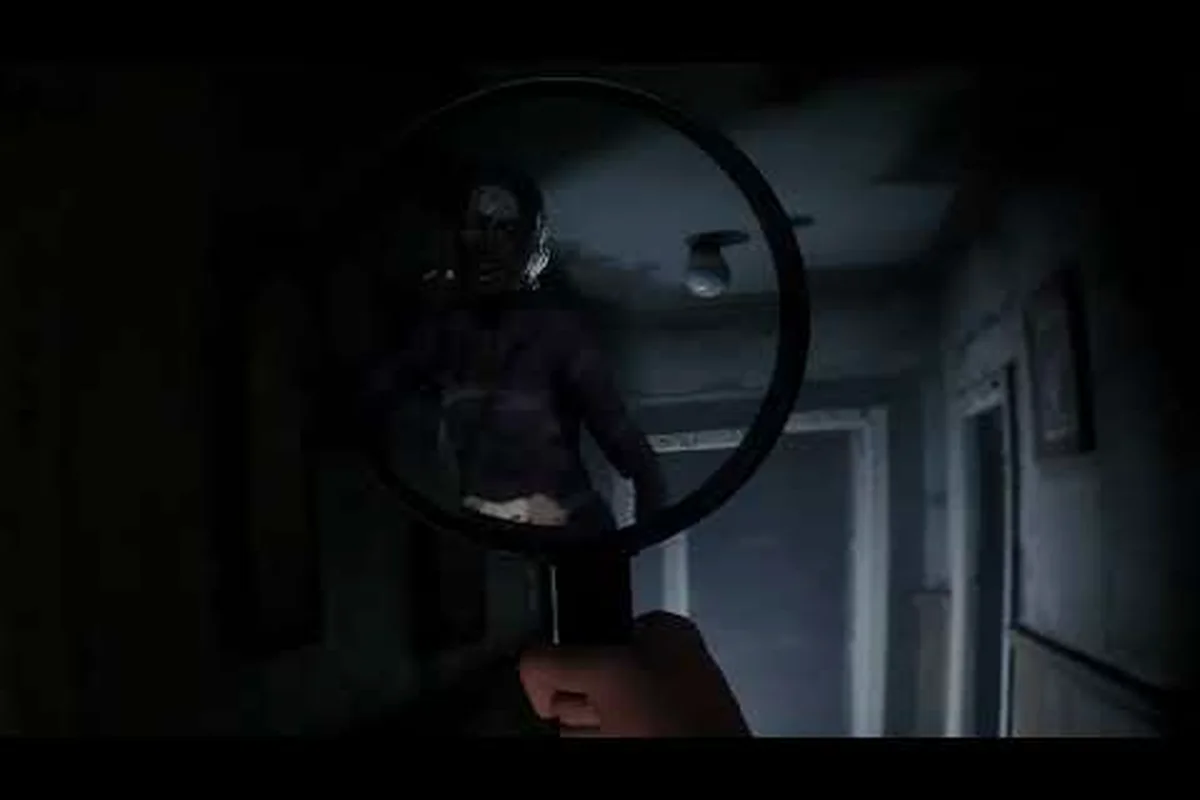
Rehaunted throws detective work into a single haunted house where every locked door and red-stained wall hides a clue you must read, photograph, and connect before the next sequence of jumpscares locks you out. The attic sits at the top of the route map, and getting there cleanly means clearing three evidence-heavy rooms first: the study, the garage, and the upstairs crime scene itself. This Rehaunted attic walkthrough maps every objective, tool use, and evidence-board check you need to reach the finale without backtracking through half the house.
The game ships as a first-person psychological detective horror title from French studio Cauchemar, released on Steam for Windows PC on September 14, 2026, and built around UV scans, camera captures, and a magnifier that all feed an evidence board gated by your progress. The walkthrough below treats the house as an evidence-gated route, so each room section lists the required tool, the evidence it unlocks, and the next door it opens, which keeps the Rehaunted attic walkthrough usable whether you are stuck on a single clue or planning a clean first run. For a wider view of the full room sequence from entry to attic, the Rehaunted chapter list covers the living room and hallway legs that lead into the rooms below.
Study Walkthrough: Tools, Clues, and Board Triggers
The study is your first evidence-heavy room after the hallway, and it teaches the core loop that the rest of the Rehaunted attic walkthrough depends on: scan, photograph, magnify, and connect. Connor Raines enters the study with a UV flashlight, a magnifier, a camera, and a walkie-talkie, and every tool has a specific role that maps to a specific evidence-board node.
Required Tools and Their Targets
Each tool in Rehaunted reads a different layer of the environment, and the study is where you confirm the layering for the first time. The UV flashlight exposes blood, fluids, and residues invisible to the naked eye; the camera captures a wide shot that the evidence board can cross-reference; the magnifier inspects small objects like diary pages, key fragments, and torn notes; and the walkie-talkie relays context from the dispatch feed that often pins a timeline to a specific room.
| Tool | Primary Use in Study | Evidence-Board Node Triggered |
|---|---|---|
| UV flashlight | Reveals blood trail behind bookshelf | Blood pattern → suspect timeline |
| Camera | Captures wide shot of overturned desk | Scene photo → entry log |
| Magnifier | Reads torn diary page on the floor | Diary fragment → motive link |
| Walkie-talkie | Receives dispatch call about the victim | Timeline marker → case clock |
The board will not advance to the next room until every node from the study is checked, so a clean first pass means scanning every wall, not just the obvious hotspots. Community testing on the September 2026 build reports that the UV flashlight must sweep the entire bookshelf backing at least twice, because the first pass only reveals a partial blood pattern and the second pass fills in the rest of the trail.
Objective Sequence in the Study
The study follows a strict four-step sequence that repeats, with variations, in every later room. Skipping a step or trying to photograph before scanning usually soft-locks the objective and forces a reload, so the Rehaunted objective guide treats this order as canonical.
-
Step 1 — UV sweep: walk the perimeter of the room with the UV flashlight on, including behind furniture and inside open drawers, until the blood pattern node lights up on the board.
-
Step 2 — Photograph the scene: stand back far enough to frame the whole desk or shelf in the shot, then take the photo so the scene-photo node resolves.
-
Step 3 — Magnify small objects: pick up the torn diary page, the key fragment, and any other interactable on the floor, then read each one with the magnifier to unlock the motive link.
-
Step 4 — Listen to dispatch: stay still until the walkie-talkie plays the full dispatch clip, because the timeline marker only resolves after the audio finishes.
The room exits to the garage once all four nodes are green, and the locked door in the back of the study clicks open automatically. Players who want a fuller picture of the diary fragments and the motive they build toward should cross-check the Rehaunted missable clues breakdown, which lists which evidence can be soft-locked if you magnify the wrong object first.
Garage Walkthrough: The Mechanic That Breaks First-Timers
The garage is the second gate on the Rehaunted attic walkthrough route, and it is also the room where most first-time players get stuck because the evidence here is mechanical rather than visual. Instead of blood patterns, the garage hides tool marks, a broken lock, and a tire-track imprint that only the camera can frame at the right angle.
Garage Evidence Map
| Evidence | Tool to Read It | Common Mistake |
|---|---|---|
| Tool marks on workbench | UV flashlight | Forgetting to scan the underside of the bench |
| Broken padlock | Magnifier | Magnifying while standing, which loses the angle |
| Tire-track imprint on floor | Camera | Shooting too close, so the imprint is cropped out |
| Dispatch audio about a vehicle | Walkie-talkie | Walking away before the clip ends |
The Rehaunted garage walkthrough pattern is to clear the visual evidence first (UV + camera), then magnify the padlock, then wait out the walkie-talkie clip, because the dispatch audio here often confirms a vehicle timeline that the tire-track photo cannot prove on its own. Community reports from the Steam community hub suggest that standing on the workbench side of the room when the walkie-talkie plays triggers an extra dispatch line that fills in a missing timeline node, so it is worth parking there for the full clip.
Sequence Differences from the Study
The garage shares the four-step loop with the study, but it adds a fifth mechanical step: you must photograph the tire track from a specific distance and angle for the evidence board to accept it. The accepted range is roughly three to four meters back, framed so the imprint fills the lower half of the photo. Closer shots get rejected as too tight, and wider shots get rejected as too empty, which is why many players fail this node on their first attempt.
A clean garage pass usually takes 8 to 12 minutes on a first run and 4 to 5 minutes once you know the camera angle, which lines up with the broader pacing data that veteran players report for the full route up to the attic. For context on how the garage fits into a speed-oriented clear, the Rehaunted speedrun guide covers the skip routes that experienced runners use to skip the dispatch clips without losing the timeline nodes.
Crime Scene Walkthrough: The Final Evidence Gate Before the Attic
The upstairs crime scene is the third and final gate on the route to the attic, and it is also the most evidence-dense room in the house. The Rehaunted crime scene walkthrough treats this room as the last board-reset point before the finale, so every clue here has to be logged cleanly to avoid a soft-lock at the attic door.
Crime Scene Evidence Map
| Evidence | Tool to Read It | Board Node |
|---|---|---|
| Victim's body outline | UV flashlight + magnifier | Identity confirmation |
| Window latch position | Camera | Entry-point photo |
| Diary final page | Magnifier | Motive confirmation |
| Footprint leading to attic hatch | UV flashlight + camera | Route confirmation |
The body outline is the trickiest evidence in the room because it only appears under UV after you magnify a small smudge on the floor first, which is the opposite order from the study. Players used to scanning before magnifying tend to miss the smudge trigger and then wonder why the body outline never appears. The crime scene also introduces the only camera angle in the game that requires you to shoot through a doorway, because the footprint leading to the attic hatch sits in the hallway outside the room and only frames correctly from inside.
Step Order for the Crime Scene
-
Step 1 — Magnify the floor smudge to trigger the UV reveal of the body outline.
-
Step 2 — UV sweep the body to lock the identity-confirmation node.
-
Step 3 — Photograph the window latch from a medium distance so the open angle is visible.
-
Step 4 — Magnify the diary final page on the desk to confirm the motive.
-
Step 5 — Move into the hallway and shoot the footprint that points to the attic hatch.
-
Step 6 — Listen to the final dispatch clip on the walkie-talkie to seal the route-confirmation node.
The attic hatch unlocks once all six nodes are green, and the door opens with a short scripted sequence that transitions the route to the final room. This is the last objective the Rehaunted objective guide requires before the finale, so treat any soft-lock here as a reload rather than a fix-it-in-place problem, because the board will not accept partial evidence once the hatch sequence has started.
Attic Walkthrough: Reaching the Finale
The attic itself is short compared to the three rooms below it, but it carries the heaviest scripted load, because the finale cinematic is gated by the evidence state you carry in from the crime scene. The Rehaunted attic walkthrough treats the attic as a three-stage space: the climb, the evidence-board review, and the finale trigger.
According to the Rehaunted workshop hub on Steam, players should begin by inspecting the dusty trunk in the corner to reveal the first clue needed to progress through the attic's environmental puzzles.
Attic Room Map
| Stage | Location in Attic | Required Action |
|---|---|---|
| Climb | Ladder to hatch | Interact with hatch once unlocked |
| Evidence review | Center of attic | Stand in front of board, listen to summary |
| Finale trigger | Back wall of attic | Interact with the final object once the board resolves |
The evidence review is unique because the board does not accept new evidence in the attic; it only summarizes what you brought in. If any node from the study, garage, or crime scene is missing, the summary plays but the finale trigger stays locked, which is why the three rooms below the attic have to be cleared cleanly. Players running a second pass for a different ending should note that the attic itself is not where ending choices are made; the choice is read from the evidence state you carried in, which the Rehaunted ending walkthrough breaks down in full.
Common Attic Soft-Locks
-
Hatch will not open — usually means a node from the crime scene is missing; check the board in the hallway outside the attic room.
-
Board summary plays but finale will not trigger — confirms a missing study or garage node, not a crime scene node, so reload the earlier room.
-
Final object has no prompt — the walkie-talkie clip from the crime scene likely did not finish; the board needs the audio timestamp, not just the visual evidence.
A clean attic pass after a clean three-room pass takes roughly 3 to 5 minutes, and the finale cinematic runs about 2 minutes, so the total time from the top of the stairs to the credits is short. The pacing is intentional, because the attic is built as a payoff room rather than a puzzle room, and the design expects you to arrive with a full evidence board rather than to debug it in place.
Walkthrough Strategy: How to Run the Three-Room Route Cleanly
The three-room route to the attic is a fixed sequence, but the order in which you clear evidence inside each room matters more than the order in which you visit the rooms. The strategy below is the one veteran players on the Steam community hub describe as the cleanest first-run path, and it is the same path the Rehaunted attic walkthrough is built around.
Tool Priority Per Room
| Room | First Tool | Second Tool | Third Tool | Last Tool |
|---|---|---|---|---|
| Study | UV flashlight | Magnifier | Camera | Walkie-talkie |
| Garage | UV flashlight | Magnifier | Camera | Walkie-talkie |
| Crime scene | Magnifier | UV flashlight | Camera | Walkie-talkie |
The study and garage share the same order, but the crime scene flips the first two because the body outline needs the magnifier trigger before the UV sweep will reveal it. Forcing the study order onto the crime scene is the most common reason first-time players report a soft-locked body outline, so treat the crime scene as the rule-breaker on the route.
Evidence-Board Hygiene
-
Check the board after every room, not just at the end of the route, because partial evidence often hides until you read the board in a quiet moment.
-
Do not skip the walkie-talkie clips, even when the room feels cleared, because the audio feeds the timeline node that the visuals cannot prove alone.
-
Photograph from a fixed distance band, roughly three to four meters, to keep the camera-angle rejects down to a minimum across all three rooms.
-
Reload rather than debug when a node is missing, because trying to fix a soft-lock in place usually costs more time than restarting the room.
Players aiming for a full clear across every ending and achievement will also want to track which clues are easy to miss in passing, and the Rehaunted completionist guide lists the achievements that gate on evidence you only see once, which lines up with the per-room evidence map above. According to the official Steam page, the route to the attic is the only fully scripted leg of the game, while the endings branch from the evidence state you carry into the finale, so a clean three-room pass is the foundation for every ending rather than a single path.
Frequently Asked Questions
How long does the Rehaunted attic walkthrough take on a first run?
The three-room route to the attic takes most first-time players 45 to 60 minutes, because each room has a fixed four- to six-step sequence and the evidence board rejects partial scans. Veteran players who know the camera angles and the magnifier triggers can clear the same route in 20 to 25 minutes.
Do I need the magnifier before the UV flashlight in the crime scene?
Yes, the crime scene is the only room where the magnifier has to go first, because the body outline only appears under UV after the floor smudge has been magnified. Skipping that order is the most common reason the body-outline node stays locked.
Can I enter the attic without clearing every node in the study, garage, and crime scene?
No, the attic hatch is hard-gated on the full evidence board from all three rooms, and the board will not accept partial evidence once the finale sequence starts. If a node is missing, the hatch stays closed and the walkie-talkie summary plays without unlocking the finale trigger.
Where does the ending choice happen in the attic?
The ending choice is read from the evidence state you carry into the attic, not from a prompt inside the attic itself. The attic only summarizes your board and triggers the finale, so the choice is effectively made across the three rooms below, which is why a clean pass matters for every ending.
Is the Rehaunted objective guide order the same for every playthrough?
The three-room order is fixed, but the tool priority inside the crime scene is the only step that breaks the pattern, so the route is the same on every run. The variable is which evidence you prioritize inside each room, which can shift the ending branch you reach rather than the rooms you visit.