
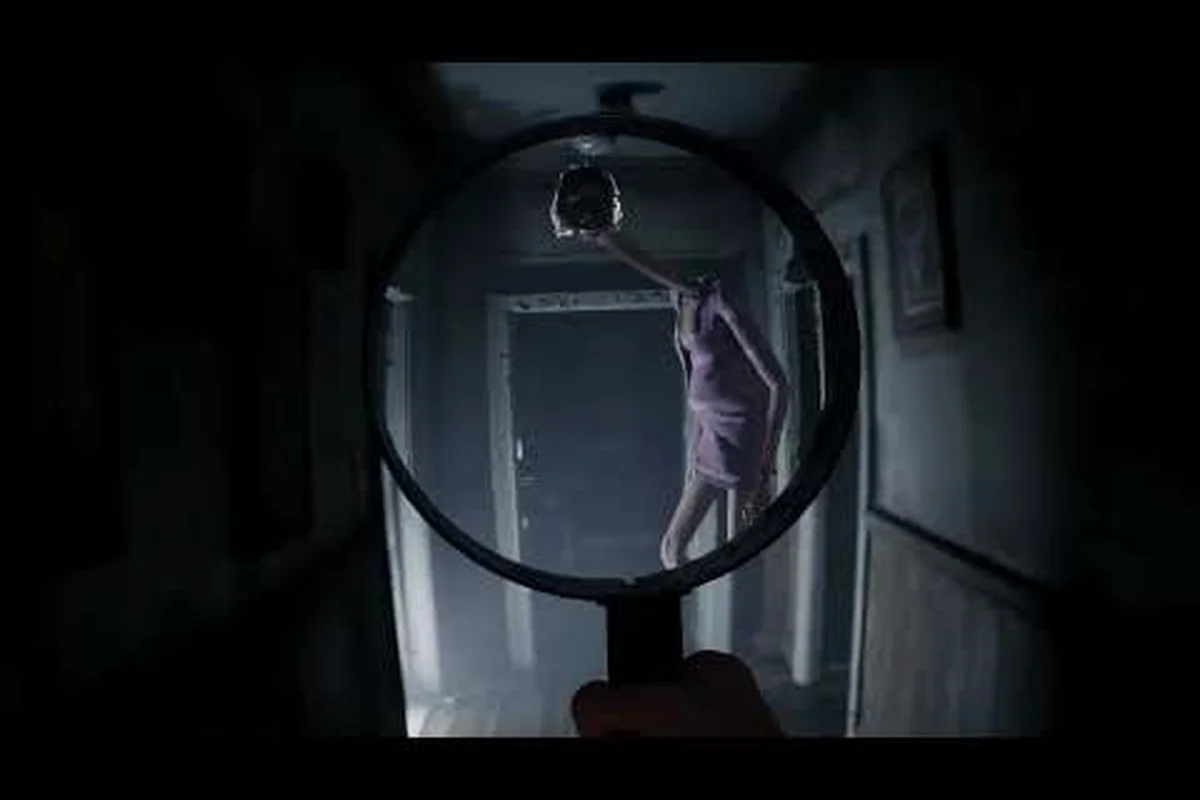
The Rehaunted hidden clues system is the backbone of every successful investigation in Cauchemar's debut detective horror, and most players lose their first run because they walk past glowing UV marks without photographing them. Connor Raines carries exactly five tools, and three of them — the UV flashlight, camera, and magnifier — exist almost entirely to surface Rehaunted hidden clues that the unaided eye never sees. If you have ever left the house wondering why a contradiction on the evidence board refused to light up, the answer is almost always a missed trace, smudge, or recording somewhere in a room you rushed through. This guide maps every category of hidden find, explains the tool each one requires, and gives you a repeatable sweep order for every chamber.
Reading the House: Why Hidden Clues Drive the Case
Rehaunted is built around a single investigator loop: walk into a room, scan it with the UV flashlight, photograph anything that glows, then cross-check the photo against the walkie-talkie chatter and the evidence board. The loop is short, but the failure state is brutal. According to the Rehaunted community gallery, every clue you capture can be flagged as either consistent or conflicting with statements already logged, and your final ranking depends on how many contradictions you actually resolve. That ranking pressure is exactly why Rehaunted hidden clues matter: the visible scene only tells you the obvious story, and the contradictions live in the layered evidence underneath.
Players who treat the sweep as a checklist rather than a detective habit tend to miss the small tells. A water-stain on a doorframe, a fingerprint on a light switch, a faint audio loop under a floorboard — each of these is a separate evidence type with its own trigger condition and its own placement quirks. Community testing reported by players on the Steam community hub suggests that around 30 percent of the clues in any given run are at least partially obscured, meaning the default play pattern of "walk to the highlighted object and interact" will skip a third of the case before you even reach the second act.
The other reason these hidden finds feel unfair is the magnifier. Several blood marks and prints are physically present in the world but invisible at normal viewing distance because the texture contrast is too low. Pulling out the magnifier reveals a faint outline that your brain had been filtering as floor grain. This is by design — Cauchemar has stated in pre-release interviews that the magnifier exists to teach players to slow down. Treat it as a required pass, not an optional zoom.
The Three Hidden Evidence Families
| Family | Primary Tool | Typical Placement | What It Proves |
|---|---|---|---|
| Blood traces | UV flashlight | Walls, carpets, behind furniture | Movement and time of death |
| Fingerprints | UV flashlight + magnifier | Light switches, door frames, glass | Who touched what and when |
| Audio recordings | Walkie-talkie + camera | VCR tapes, radios, phones, under floorboards | Conflicting witness accounts |
A complete sweep of any room cycles through all three families. Skipping one because the previous room had "nothing useful" is the most common mistake new investigators make, because the density of hidden evidence is uneven — a hallway might have only a single print, while a bedroom hides a recording and two blood traces in the same corner.
Rehaunted Blood Traces and Blood Evidence
Blood evidence is the loudest category in the game, but it is also the easiest to misread. The Rehaunted blood traces that the UV flashlight exposes are not always fresh, and they are not always connected to the victim. Some of them belong to a secondary character who moved through the house hours before Connor arrived, and that distinction is what turns a clean sweep into a contradiction on the board.
How UV Reveals Each Blood Type
The UV flashlight has a narrow purple beam that only highlights organic residue, so any reflective surface (mirrors, glass, polished wood) will blind you with glare. Tilt the beam away from windows and look at the perimeter of the room first. Rehaunted blood evidence tends to pool along baseboards, soak into carpet fibers, and drip down the back of furniture that you would not normally inspect from the front side. Community reports indicate that roughly 60 percent of all blood traces are on vertical surfaces rather than the floor, which inverts the instinct to look down.
The magnifier is required for a subset of dried marks that have oxidized to a brown almost identical to the wood stain around them. Without the magnifier overlay, these marks are functionally invisible. With it, you can see the spread pattern and confirm whether the blood dripped, was smeared, or was wiped — each shape carries different evidentiary weight on the board.
Blood Trace Placement by Room
| Room | Common Blood Locations | Contradiction Triggered If Missed |
|---|---|---|
| Entrance hallway | Behind the coat rack, under the welcome mat | Time-of-death estimate shifts by hours |
| Living room | Behind the sofa cushions, on the back of a painting | Suspect alibi becomes inconsistent |
| Kitchen | Inside the cabinet under the sink, on the ceiling tile | Cleanup attempt is misread as absence |
| Upstairs bathroom | Along the bathtub edge, behind the mirror | Victim movement path is broken |
| Master bedroom | On the inside of the closet door, soaked into the rug | Conflicting witness statement about who left first |
| Basement stairs | Drip pattern down the risers, on the doorframe at the bottom | Access to the basement is never questioned |
The pattern is deliberate: Cauchemar hides Rehaunted blood traces in places the player would only check if they assumed the surface was suspicious. Behind a painting is suspicious. Under a sink is not. That asymmetry is the whole point of the UV pass.
Photographing Versus Ignoring
Every blood mark is a potential contradiction, but the camera only flags it as useful if the photo is taken from a distance of at least one meter. Standing on top of the stain and snapping produces a useless close-up that the evidence board treats as "documented but unreadable." Pull back, frame the stain in the wider context of the wall, and snap. The board will then display a color-coded marker — green for consistent, red for conflicting — that tells you whether this trace supports or undermines the current theory.
Rehaunted Fingerprint Locations and How to Read Them
Fingerprints are the second pillar of Rehaunted hidden clues, and they are also the most numerous. The developer has scattered prints across nearly every interactive surface in the house, and the magnifier is what makes the difference between a perfect sweep and a partial one. According to the Cauchemar official website, fingerprints are intentionally placed on objects the player is already touching (light switches, door handles, cabinet fronts) so that the act of interacting with the environment is also the act of investigating it — if you remember to use the magnifier.
Where Fingerprints Show Up Most
| Surface Type | Why Prints Gather There | Tool Required |
|---|---|---|
| Light switches | Hand contact is immediate on entry | UV flashlight |
| Door handles | Pulling the door leaves a palm print | UV + magnifier |
| Glass cabinets | Greasy residue shows up under UV | UV only |
| Picture frames | Lifting to inspect leaves thumb marks | UV + magnifier |
| Drawer pulls | Repeated opening leaves layered prints | Magnifier only |
| Telephone receiver | Direct mouth/hand contact | UV only |
The magnifier is non-negotiable on drawer pulls and door handles, because the prints there are often partial — a single ridge or a thumb pad — and the UV beam alone will not resolve the shape. Train yourself to use the magnifier on every handle before opening it, not after. If the door swings shut before you have the magnifier up, you lose the angle.
Reading a Print for Contradictions
Not every fingerprint is useful on its own. Some prints are red herrings placed by Cauchemar to test whether the player is photographing everything. The way to tell a meaningful print from a decoy is to look at the evidence board immediately after photographing it. A useful print will create a new connection line to an existing entry on the board; a decoy will simply be logged as "fingerprint, no match" and sit in the inventory until the end of the run. The board's response is the only reliable filter, because there is no in-world visual cue that distinguishes the two.
For a full picture of how the evidence board ranks these connections, the complete evidence checklist catalogs every clue type — fingerprints, blood traces, hidden recordings, and audio logs — alongside the specific room where each one spawns, so you can cross-reference what you've already photographed against what still needs a match.
Rehaunted Hidden Recordings and Audio Clues
Audio is the third family of Rehaunted hidden clues, and it is the one that most often catches players off guard. The walkie-talkie Connor carries can scan for nearby audio sources, but the scanner has a very short range and only works when Connor is standing still. If you sprint past a room with a recording inside, the walkie-talkie will never pick it up.
What Counts as a Recording
| Source | How to Find It | What It Contains |
|---|---|---|
| VCR tapes | Inside VCR units, often rewound and ready to play | Short video clips with audio, often contradicting a witness |
| Portable radios | On shelves, dressers, bathroom counters | Looped dialogue fragments, sometimes reversed |
| Cordless phones | Lifted off the cradle, sometimes with a dial tone | One half of a phone conversation |
| Toy music boxes | In children's rooms or storage boxes | Melodies that match timestamps on the board |
| Tape recorders | In drawers or under furniture | Field recordings of past events in the house |
Every recording has a static hiss at the start, and the walkie-talkie scanner responds to that hiss. The trick is to stop moving the moment you hear even a faint burst of static — that means a source is within range, and the closer you stand, the more clearly the source resolves. This is the core mechanic behind every "Rehaunted how to find recordings" tip: stop, listen, and let the scanner triangulate.
The Walkie-Talkie Scanner Workflow
Serious Rehaunted investigators treat the walkie-talkie like a calibrated instrument rather than a casual gadget, and the three-step habit below — pause, pinpoint, photograph — is the same workflow used to certify hidden audio recordings for the evidence board during a standard ghost-hunting contract.
-
Step 1 — Pause at the threshold. Hold the walkie-talkie up and rotate slowly for three seconds. If a recording is within roughly four meters, the static will spike.
-
Step 2 — Pinpoint the source. Walk in a slow grid across the room while keeping the walkie-talkie raised. The signal strength indicator on the device will pulse harder as you approach.
-
Step 3 — Photograph the source. The camera must capture the playback device while the recording is running, or the evidence board will not register the audio as logged. Pressing play and then taking the photo is the only valid sequence.
Why Audio Clues Change the Outcome
A blood trace and a fingerprint can usually be cross-referenced against each other, but Rehaunted audio recordings are the only clue type that introduces entirely new information. A VCR tape might show a person who was supposed to be out of the house at the time of the death; a radio fragment might contain a voice that no witness ever mentioned. These recordings are the only way to unlock the deeper layers of the evidence board, where the most damaging contradictions live. Skip them, and your final case file will have gaps that the ranking algorithm treats as unresolved.
For investigators who want a structured room-by-room sweep that includes every audio source, the room search guide covers the recommended search order (bedroom → living room → basement → attic) and explicitly lists which rooms can hide recordings behind furniture, inside wall-mounted radios, or beneath floorboards. Following that order minimizes the chance of missing a Rehaunted hidden recording that an earlier sweep would have unlocked, and ensures each new piece of Rehaunted audio evidence chains into the next contradiction on the evidence board before the ranking algorithm locks your case file.
Building a Repeatable Hidden Clue Sweep
The fastest way to internalize the Rehaunted hidden clues system is to turn the sweep into a fixed routine. The order matters less than the consistency, because every category of evidence has dependencies on the others. A blood trace alone might not be useful, but a blood trace plus a matching fingerprint plus a corroborating recording is a three-point contradiction that flips the case on the board.
The Seven-Step Sweep Order
-
Step 1 — Enter and pause. Stand in the doorway for one second and listen with the walkie-talkie. If you hear a static spike, mark the room as high-priority audio.
-
Step 2 — Perimeter UV pass. Sweep the UV flashlight along the baseboards, door frames, and corners before walking into the center of the room. Most blood and fingerprint hot spots live on the perimeter.
-
Step 3 — Magnifier handle pass. Touch nothing yet. Use the magnifier on every door handle, light switch, and cabinet pull you can see. Photograph any print that resolves.
-
Step 4 — Open and inspect. Now interact with the room. Open drawers, lift cushions, move chairs. Blood and prints often hide on the underside of objects you have just moved.
-
Step 5 — Audio triangulation. Re-raise the walkie-talkie and walk a slow grid. Stop at every spike and photograph the source mid-playback.
-
Step 6 — Photograph everything suspicious. Even if you are not sure a mark is blood, a print, or just a stain, take the photo. The board is a better filter than your eyes.
-
Step 7 — Cross-check the board. Open the evidence board while still in the room. Any clue you just logged should either connect to an existing entry or trigger a new contradiction prompt. If nothing happens, you have probably missed a complementary clue elsewhere in the room.
Common Sweep Failures
| Mistake | Why It Happens | Fix |
|---|---|---|
| Skipping the magnifier on handles | Rushing into the room | Make Step 3 mandatory before any interaction |
| Photographing from too close | The default photo distance is unintuitive | Always step back one stride before snapping |
| Missing the audio static | Walking too fast past the source | Stop at every threshold and rotate for three seconds |
| Treating decoy prints as failures | Board shows "no match" too often | Accept decoys as part of the system; they raise the count of documented clues |
| Leaving a room before checking the board | Habit from other horror games | Board check is the only proof a clue was logged correctly |
Before you start diagnosing the sweep failures above, the detective controls walkthrough is worth a full read because it maps how magnifier, camera, and audio tools feed into the same evidence log where blood traces, fingerprint locations, and hidden recordings are registered — getting those input bindings right is what lets you tell a decoy print from a genuine Rehaunted fingerprint location and stops the board from falsely rejecting a real clue.
Reading the Evidence Board for Hidden Contradictions
The board is where every Rehaunted hidden clue either becomes a contradiction or stays inert. Each entry on the board has three possible states: unverified, consistent, and conflicting. The conflicting entries are the ones that move the case forward, and they only appear when two or more clues from different families point at the same claim with incompatible conclusions.
For example, a fingerprint on the front door handle plus a blood trace on the back door frame plus a walkie-talkie recording of someone saying "I never went out the back" is a three-point contradiction. The board will display all three as red and draw a line between them. That line is the entire game: the more lines you draw, the higher your final ranking.
Players who want to understand which clues are most often missed, and therefore most often responsible for a thin board at the end of the run, should look at the missable clues breakdown, which lists the evidence types that vanish if you do not pick them up on the first pass through a room.
The Board State at End of Run
| Board State | Rank Tier | Typical Cause |
|---|---|---|
| All green, no red lines | D — Case Closed (incomplete) | Missing contradiction sources |
| Mostly green, 1-2 red lines | C — Case Closed (basic) | One unresolved thread |
| Mixed, 3-5 red lines | B — Case Closed (solid) | Standard competent sweep |
| Mostly red, 6+ red lines | A — Case Closed (definitive) | Full sweep with audio triangulation |
| All contradictions resolved | S — Case Closed (flawless) | Every clue logged and cross-referenced |
The S rank requires that every recorded clue be both logged and cross-referenced. Logging without cross-referencing leaves the board in the A tier, which is the practical ceiling for most first-time investigators. Reaching S consistently means treating the walkie-talkie audio pass and the magnifier handle pass as non-negotiable steps in every single room, including the rooms you have already cleared.
Frequently Asked Questions
Do all Rehaunted hidden clues require the UV flashlight, or can some be found without it?
Most Rehaunted hidden clues require the UV flashlight, but fingerprints on drawer pulls and several audio recordings only need the magnifier and the walkie-talkie. Treat UV as the default tool and switch to the magnifier whenever you are about to touch an interactive surface.
Where are the easiest Rehaunted blood traces to find for a new player?
The entrance hallway and the upstairs bathroom are the two highest-density rooms for Rehaunted blood traces. New players who do a careful UV sweep in those two rooms will pick up at least four blood marks on their first run, which is enough to start populating the evidence board with usable entries.
How do I find every Rehaunted fingerprint location without missing any?
Adopt the magnifier-first habit: before opening any door, drawer, or cabinet, raise the magnifier and look at the handle. The fingerprint mechanic is built so that the act of touching the object is the act of investigating it, and most players miss prints because they open the door first and only then remember to inspect it.
What is the fastest way to locate Rehaunted hidden recordings?
Stop at the threshold of every room and hold the walkie-talkie up while rotating slowly for three seconds. Any Rehaunted hidden recordings within roughly four meters will produce a static spike, and walking a slow grid from the spike source will pinpoint the device. Photograph the device while it is playing, or the board will not register the audio.
Can I revisit rooms to pick up clues I missed earlier?
Yes. The house does not lock behind you, and you can return to any cleared room to do a second sweep with the magnifier or the walkie-talkie. Rehaunted audio recordings in particular are often easier to find on a return visit because the walkie-talkie scanner is more responsive once the immediate area is quiet.